How to Install FLEXIPIXTILE?
1- Make sure the surface is clean, dry and clear from any imperfections and unevenness. (Figure 1)
(We recommend applying a coat of primer if the surface is raw, unfinished or covered with powder, dust or sand.)
2-Dryfit the tiles on the wall and layout/draw their locations, using a level and chalkline. Be sure the horizontal lines are level and vertical lines are plumb.(Figure 2)
3- Peel the tile red backing slightly as shown in Figure 3.
4- Align the edge of peeled part with the previous installed tile edge and stick it to the surface as shown in Figure 4. Peel off the rest of the backing gradually and stick the tile completely. (Please note that the backing adhesive is very strong and cannot be adjusted once installed.)
5- Dab the tile with a soft and flat rubber hammer or push it by hand or a clean cloth. Do not use heavy force or hard hammer to avoid denting the tile. (Figure 5)
6- Follow the instructions 3-5 to finish installing the rest of the project.
7- To fit the edges, you can cut in between the joints, using a utility knife. If you need to cut the chips, please use a Sheet Metal Scissor or End Nipper. (Figures 8 & 9)
8- Wait for 30 minutes and then gently peel the top protecting film off the tile surface. (Figure 6)
9- Clean the tiles surfaces with a cloth and enjoy your new decoration! (Figure 7)

How to Install EZWALLcover?
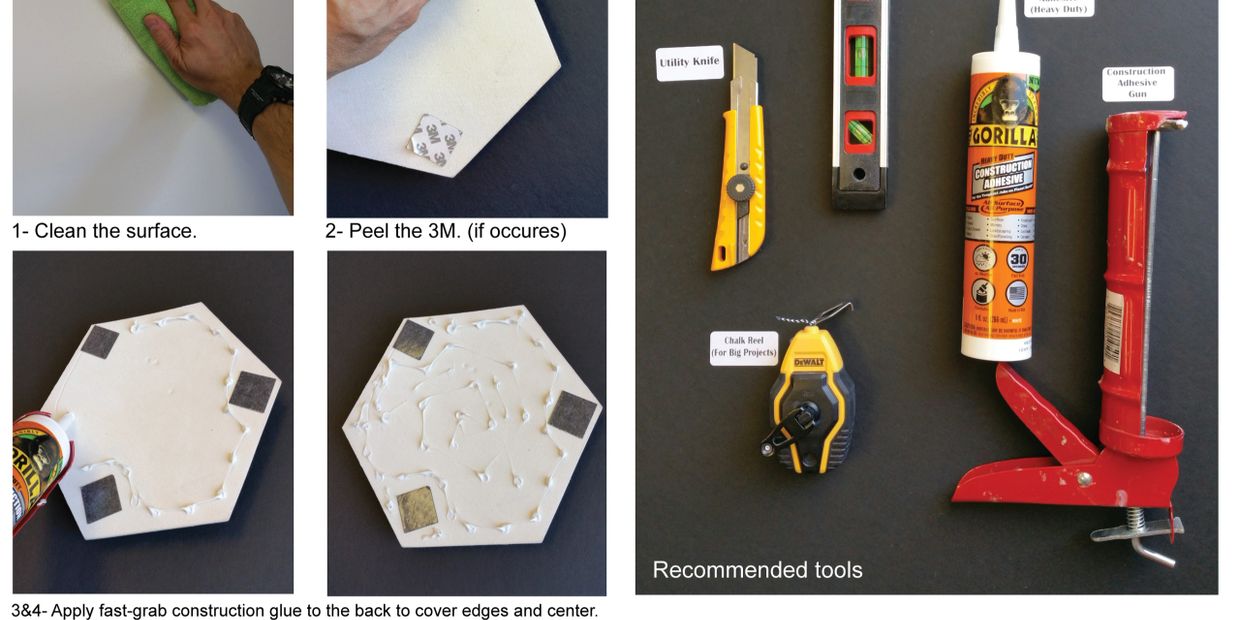
- Make sure the surface is clean, dry and clear from any imperfections and unevenness. (Figure 1)
(We recommend applying a coat of primer if the surface is raw, unfinished or covered with powder, dust or sand.) - For best result we recommend to draw guidelines, using a level and chalkline. Be sure the horizontal lines are level and vertical lines are plumb.(Figure 2)
- If applicable, peel the tile 3M backing, as shown in Figure 3.
- Apply a heavy duty, fast grip construction glue to the back of the panels, covering all edges and center of panels. (Figures 4 & 5)
- Align the edge of the panel with the previous installed panel edge and stick it to the surface as shown in Figure 6.
- Push the panels by hand or a clean cloth for 1 minute. Do not use heavy force or hard hammer to avoid damaging the panels. (Figure 7)
- Follow the instructions 3-6 to finish installing the rest of the project.
- To fit the edges, you can cut the panels, using a sharp utility knife. (Figures 8 & 9)
- Clean the tiles surfaces with a cloth and enjoy your new decoration! (Figure 7)